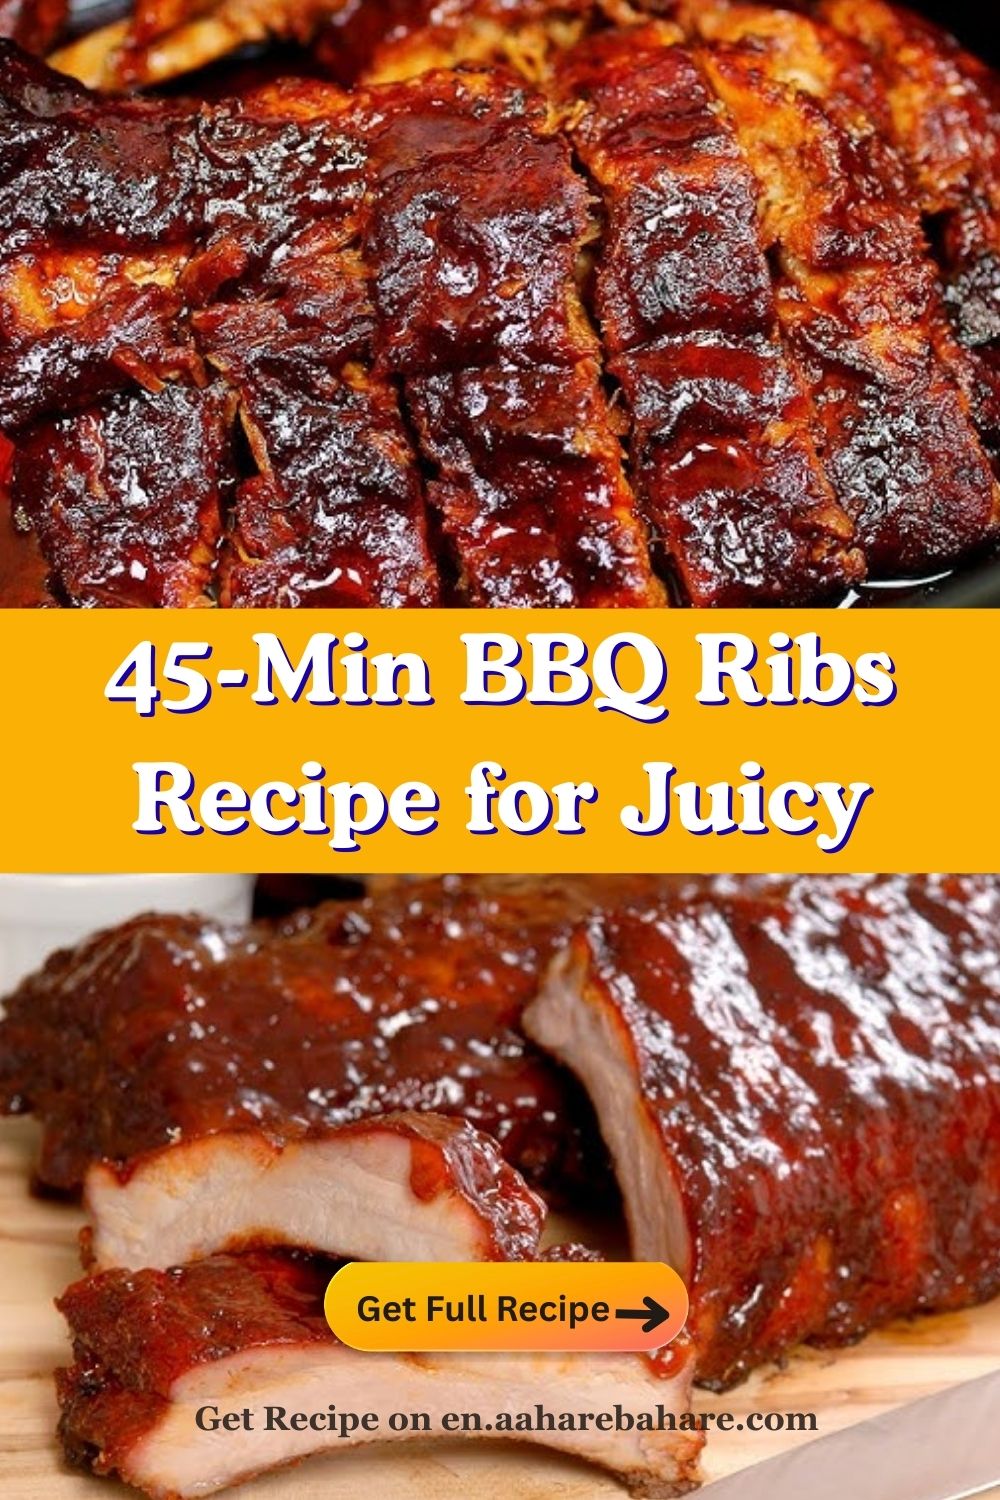
45-Min BBQ Ribs Recipe for Juicy, Fall-Off-the-Bone Flavor
BBQ ribs bring that perfect mix of smoky, sweet, salty, and messy-in-the-best-way that turns a regular meal into a mini event. Ever sit there with sauce on your face thinking, “Yeah, this counts as self-care”?
You can cook ribs low and slow on the grill and get that classic tender, juicy, pull-from-the-bone texture without turning them into mush. IMO, when you dial in the heat and timing, ribs stop feeling “intimidating” and start feeling like your party trick BBQ ribs.
What You Need For 4 People On BBQ ribs
For four hungry people, you want about 1 rack of baby back ribs per 2 people, so go with 2 racks (about 4–5 lbs total). That usually gives enough for seconds and a few “I swear this is my last piece” moments.

Main Ingredients (Serves 4)
- 2 racks baby back pork ribs (4–5 lbs total)
- ¼ cup yellow mustard (as a binder so the rub sticks)
- ½ cup BBQ dry rub (store-bought or homemade)
- 1 cup BBQ sauce, your favorite style (sweet, spicy, smoky—your call)
Simple Homemade Dry Rub (Optional but awesome)
Mix these for a solid all-purpose BBQ rib rub:
- ¼ cup brown sugar
- 1 tbsp smoked paprika
- 1 tbsp chili powder
- 1 tsp garlic powder
- 1 tsp onion powder
- 1 tsp black pepper
- 1 tsp salt
- ½ tsp cayenne pepper (optional for heat)
You coat the ribs evenly with this rub and get that deep sweet-heat bark that screams proper BBQ.
Total Time & Cooking Timing
You cook proper BBQ ribs low and slow, so plan on about 3–3½ hours total:
- Prep time: 20–30 minutes (trim, remove membrane, season)
- Rest with rub: 30 minutes (minimum; longer adds more flavor)
- Grill time: 2½–3 hours at about 275–300°F, indirect heat
- Sauce + finish: 10–15 minutes over higher heat to caramelize sauce
So yeah, you commit some time, but you don’t stand there flipping them every 30 seconds like a stressed line cook. You mostly let the grill do its thing.
How To Prep The BBQ ribs Like A Pro
Ever wonder why some ribs taste amazing and others taste like sweet leather? Prep makes the difference.
Step 1: Remove the Membrane
On the bone side of the ribs, you usually see a thin, shiny membrane. You slide a butter knife under it, grab it with a paper towel, and pull it off. This step helps the rub sink in and keeps the ribs from turning chewy.
Step 2: Dry and Mustard
Pat the ribs dry with paper towels so the seasonings actually cling. Then:
- Rub a thin coat of yellow mustard over both sides.
- The mustard mostly disappears during cooking and works as a flavor-neutral glue for the rub.
If mustard on ribs sounds weird, trust the process. You don’t taste “hot dog vibes” in the final bite.
Step 3: Season Generously
Sprinkle your dry rub all over the ribs and pat it in. Make sure you cover:
- The meaty top
- The bone side
- The edges
Let the ribs rest with the rub on them for at least 30 minutes, or stash them in the fridge for a few hours if you plan ahead. This rest time lets the salt pull in some moisture and carry flavor deeper into the meat.
Setting Up Your Grill
You don’t need a fancy smoker; you just need indirect heat and a little patience.
Gas Grill Setup
- Preheat the grill to 275–300°F.
- Turn on only one side of the burners and leave the other side off.
- Place a small foil packet of wood chips over the lit burner if you want extra smoky flavor.
Charcoal Grill Setup
- Pile lit coals on one side of the grill to create a hot zone and a cooler zone.
- Add a few soaked wood chunks or chips on top of the coals for smoke.
- Keep vents partly open and aim for steady 275–300°F.
You cook the ribs on the cool side of the grill, not directly over the coals or flames. That low, indirect heat keeps them tender and juicy instead of scorched and sad.
Step‑By‑Step: BBQ Ribs For 4 People
Ever wish someone just laid out the game plan without 900 side tangents? Here you go.
1. Prep & Season (30–40 minutes)
- Trim any large flaps of loose fat.
- Remove the membrane from the bone side.
- Pat dry and rub with yellow mustard.
- Coat thoroughly with dry rub.
- Let ribs sit 30 minutes at room temp (or longer in the fridge).
2. Get The Grill Ready (15–20 minutes)
You want a stable temp more than a perfectly exact number. As long as you stay roughly in that range, you win.
3. Low & Slow Cooking (2½–3 hours)
- Place ribs bone-side down on the cool side of the grill.
- Close the lid and cook them without constant flipping.
- Check about every 45–60 minutes to:
You know you’re in a good place when you see the meat pull back from the bones by about ½ inch and the ribs feel flexible when you lift them with tongs.
4. Sauce & Caramelize (10–15 minutes)
When the ribs feel tender:
- Brush both sides with your favorite BBQ sauce.
- Move them over direct heat for a few minutes per side.
- Watch them closely so the sugar in the sauce caramelizes instead of burns.
This step turns a good rib into a sticky, shiny, glazed masterpiece.
5. Rest & Serve
- Let the ribs rest 5–10 minutes off the heat.
- Slice between the bones into individual ribs or 2–3 bone sections.
- Serve with extra warm sauce on the side.
At this point, you probably lose the ability to “plate nicely” because people start hovering. Fair.
Flavor Tweaks & Style Choices
Ever argue with someone about what “real BBQ ribs” taste like? Yeah, same.
Sauce Styles You Can Try
- Sweet & smoky (Kansas City–style): Thick, tomato-based, sweet from brown sugar or molasses, great for that classic sticky finish.
- Vinegar-forward (Carolina vibes): Thinner, tangier sauces that cut through the fat and feel lighter.
- Spicy: Add extra cayenne, hot sauce, or a spicy BBQ blend if you like a slow burn.
You can also keep things super simple and just use a good store-bought sauce and your own rub. FYI, no one complains when the ribs taste great.
Dry vs Saucy
- Dry ribs: You lean on the rub and smoke, then maybe add a light mop or glaze at the end.
- Saucy ribs: You go in hard with the sauce near the end and serve more on the side.
Both work. Pick your team and own it. 🙂
Common Mistakes To Avoid
You avoid a lot of heartbreak if you dodge a few classic rib fails.
- Don’t boil your ribs first. This strips flavor and ruins texture even if the meat falls off the bone.
- Don’t crank the heat. High heat over direct flame turns the outside into charcoal while the inside stays tough.
- Don’t keep lifting the lid. Constant peeking drops your temp and stretches cooking time for no real benefit.
You treat ribs like a slow project, not a sprint. Your patience pays you back in juicy bites.
FAQ About BBQ Ribs
How long should I cook BBQ ribs?
You usually cook ribs for about 2½–3 hours at 275–300°F using indirect heat, plus 10–15 minutes to caramelize the sauce over direct heat. Always check for tenderness (meat pulling back from the bones and good flexibility) instead of obsessing over the clock.
Can I start ribs in the oven and finish on the grill?
Yes, you can bake ribs wrapped in foil at a moderate oven temp, then finish them on the grill to add smoke and caramelize the sauce. This method helps if you want more control indoors and just use the grill for that final char and flavor.
Do I really need to remove the membrane?
You don’t absolutely have to, but removing the membrane makes the ribs more tender and easier to bite through, and it lets rub and smoke reach the meat better. The step only takes a minute and pays off in better texture, so it’s worth doing.
Can I use this method on beef ribs?
You can use a very similar approach for beef ribs, but you often need slightly longer cook times because they run larger and fattier. Keep the same low-and-slow technique and adjust time until they feel tender and the meat pulls back from the bones.